This and that

Thursday, December 6, 2012

Homemade turtles

Pecans, chocolate and caramel...
Aren't those the best things ever
I love making homemade chocolates,
you can give them for gifts or just eat them yourself...
and they taste so much better then the store bought ones
Because you did them with love...
I learnt to make
Homemade Turtles
many years ago and bought turtle molds so that they looked like turtles.
My molds are starting to look old and I wasn't even sure you could buy them anymore
So I went on line and found them...
You can buy them from Global Sugar Art

I usually buy my caramel ~ using either Werther's or Kraft
This year I decided to make my own... you can find the recipe here.
And the chocolate that I like using is Ghirardelli or Hershey and often I will combine them.
You can also use chocolate wafers if you want.
I don't have a double boiler, so I melt my chocolate in a dish that is over a pot filled with water

I don't have a recipe for these, so will just show you what I do..

First get everything ready.. Melt your chocolate I just leave it in my pot with hot water
so that it stays melted.
Have your caramels, pecans and molds ready.

melted chocolate, caramels, pecans and mold


a picture of the mold I used.

Drop a teaspoon or so of chocolate at the bottom of the mold.
Place a small amount of caramel on the round part of the pecan and 
place it caramel side down on the chocolate.
*** Make sure you have the flat side of the pecan facing up or you will have a pregnant turtle.


Cover the mold with chocolate.
I use a small brush to move the chocolate around the mold and fill them in.

Chill until firm.
You can place them in the freezer or do what I do, put them outside on my porch to harden.
Once hardened, turn the molds upside down and gently tap to release the turtle.
Occasional a limb or head might fall off...
You can glue them back on by using a small brush and melted chocolate.


Caramels.... Salted or not!

Do you like your caramels salted or not?
I have gotten into eating Salted Caramel....
I love the taste of sweet and salty together.....
And put it together with chocolate and it is wonderful. 

I found this recipe for Microwave Caramel from Food.com
this is simple and tastes great 
It is great for when I make my turtles...

aren't these just the cutest.... They look like real turtles.
I promise that I will show you how to make these cute turtles in a separate posts
Today's post is about the caramel

Microwave Salted Caramel
adapted from Food.com
1/4 cup butter
1/2 cup white sugar
1/2 cup brown sugar
1/2 cup light Karo Syrup - I use Roger's Syrup that I buy in Canada
1/2 cup sweetened condensed milk
1 tsp salt 

Combine all ingredients in a microwave safe bowl.  Cook on high for 6 minutes, stirring every 2 minutes.  Stir and pour in lightly greased pan.  Cool.  Once cool and slightly hardened score into small pieces.  I put mine back in the fridge until set and then brought it out and cut the candies. 

I put tinfoil and lightly greased it... this way I could pull the caramel out of the dish and cut them

My first batch I did not put the salt in with all the ingredients and once I poured them into the pan, I sprinkled Kosher salt on the caramels.

Once caramels are set, you can dip them in melted chocolate... YUM! or eat them as is...

Making microwave caramels #candy #christmas #c...
I put tinfoil in my dish... this way I could pull it out to cut.

Caramels, sprinkled with Kosher salt...
salted caramel dipped in chocolate

Enjoy!


Enhanced by Zemanta

Wednesday, December 5, 2012

November Foodie Pen Pal

I am so late getting this post done.... 
I am not sure when and where the time went...
But I wanted to let you know about Novembers Foodie Pen Pal
I received a wonderful box of goodies from
Crista from  Peace, Love, Quinoa.


 Isn't this a great box of things...
The Gin-Gin chewy Ginger Candies are delicious... 
I love ginger so this was a great gift and I had to put them away or I would have eaten them all in one sitting
I also have ate the Rock Creek Crisp...
I didn't eat them all at once but just about..
YUM! they were so tasty.
I took them to work and munched on them over a few days.
Crista also sent me some granola and I have tried very hard not to open them yet as I want to save something for later and I am also saving the Lemon Cookies.
Thank you Crista for the great foodie gifts... They all are wonderful!
I sent my package to Kellie, she doesn't have a blog but  told me that she 
liked sweet and salt and was a student.
So I sent her a package of homemade cookies that had ripple potato chips in them 
and my cuban lunch bars with chocolate and ripple chips... along with tea and coffee.


Lindsay ~ from The Lean Green Bean does a wonderful job at coordinating this event.
Each month you are given someone to send a foodie package too and someone
different sends to you... It is a great way of meeting some wonderful people.
This month instead of exchanged packages, Lindsay has set up
Foodie Penpal for Hurricane Sandy Relief and
you can donate make a donation...
FPP Sandy1 Foodie Penpals for Hurricane Sandy
Foodie Penpal for Hurricane Sandy Releif


Thursday, November 29, 2012

Foodie Friends Friday ~ November 29/12

November is just about over... and the busy season is starting
Are you ready.. I am not and I feel that my schedule is so tight that I don't have a minute to breath.
But good thing for Foodie Friend Friday Linky Party
We have recipes right here at our fingertips... 
Our last party was a great success with 173 recipes linked up
I also want to thank everyone who voted and clicked my recipes
as I won Voted Top 3 and Most ..  

We have a great giveaway for this week from Locust Hill
3 random winners will win a jar of either apple raspberry honey jam or cranberry apple honey jam
 (their choice)


Remember to fill out the Rafflecopter
 for you chance to win
a Rafflecopter giveaway


Host for this week:

Foodie Friends Friday http://www.foodiefriendsfriday.com
Tracy at Busy Vegetarian Mom http://www.busyvegetarianmom.com
Marlys at This and That  http://marlys-thisandthat.blogspot.com/
Lois at  Walking on Sunshine http://wifeofthecolonel.blogspot.com/
Michelle at  From Calculus to Cupcakes http://www.fromcalculustocupcakes.com
Cynthia at Feeding Big  http://www.feedingbig.com
Jodie at Binomial Baker http://www.binomialbaker.blogspot.com
R Dawn at Spatulas on Parade http://www.spatulasonparade.blogspot.com
Angie at A lil Country Sugar http://www.alilcountrysugar.blogspot.com
Jutta at HungryLittleGirl http://www.hungrylittlegirl.com/
Cindy at Cindy's Recipes and Writings: : http://www.cindysrecipesandwritings.com 
Joanne at Winelady Cooks: http://www.wineladycooks.blogspot.com
Marlene at Nosh My Way: http://www.noshmyway.com


Last Week Winners:
This and That ~Palpitation Cupcakes
Crumbs in my Mustachio ~ Eggnog Bundt Cake
This and That ~  Salted Caramel Mocha Latte

This and That ~Palpitation Cupcakes
This and That Salted Caramel Mocha Latte
Hun... What's For Dinner ~ Mexican Nutella Hot Chocolate


Also remember:
Foodie Friends Friday ~ Daily Dish
is having a gingerbread contest
gingerbread house competition


Sunday, November 25, 2012

Salmon Croissant or Bread stick Casserole for breakfast

I am always on the look out for great breakfast recipes and I think I finally found something that is wonderful and fairly easy to make. You do have to plan ahead of time as it does take sometime to get it ready and cook... but once it is baking... just sit back and enjoy the smells.  I have made this recipe twice.  The first time I made it was with Pillsbury garlic bread sticks and it was yummy but the temperature the original recipe said I think was too hot and the bread stick got too brown for my liking.  The second time I made them, I used large buttery croissants and turned the temperature down and they worked out wonderfully.
My husband preferred the garlic bread stick one and I plan to make them again with the bread sticks at the lower temperature and see what happens.  I will let you know when  I do it.

IMG_3872a.jpg


Salmon Croissant or Bread stick Casserole
adapted from All Recipes Croissant and Salmon Breakfast Casserole

6 garlic bread sticks or 5 buttery croissants (large size)
1/4 cup onions chopped
1/3 cup mushrooms chopped
1/4 cup red peppers chopped
1 tbsp oil 
7 eggs beaten
1/2 tsp thyme
1 tsp dill 
1 tbsp garlic if using croissants
1 tsp salt
1/4 cup milk
1 cup Monteray Jack and Colby Cheese shredded
3 -4 oz smoked salmon

Preheat oven to 350 degrees
Bake garlic bread sticks or croissants as directed on package.  Cut up half of the bread sticks into small pieces or the bottoms of the croissants and place in the bottom of a 9 x 9 pan.  Place the other bread sticks and tops of croissants to the side.  
Saute onions, mushrooms and peppers in oil until golden and place on top of the broken pieces of bread sticks or croissants.  Spread cheese and salmon over mixture.  In separate bowl mix eggs and milk until frothy add thyme, dill, garlic (if using),and salt.  Pour this mixture over top of everything.  Arrange the left-over bread sticks or croissants on top, pressing into egg mixture.  Bake for 45 -50  minutes until eggs are set and croissants or bread sticks are brown.  Serve hot.

IMG_3862a.jpg
ready to go into the oven

IMG_3866a.jpg
the bread sticks came out very brown.  I also used a smaller
dish.  The second time I used a 9 x 9 pan and
it worked perfectly.

IMG_3870a.jpg
made with bread sticks...

IMG_3872a.jpg
made with croissants.

This dish would also be great for lunch with a nice salad or a light dinner.  You could change the meats, veggies and also the spices to make it your own.  The possibilities  are endless.  Enjoy!


Thursday, November 22, 2012

Thanksgiving.


He who thanks but with the lips
Thanks but in part:
The full, the true Thanksgiving 
Comes from the heart.
J.A. Shed


As I sit here this morning, thinking of Thanksgiving...
I fill blessed for so many things.
First to God as with out Him we would have nothing to be thankful for.
Then to our country and those who put their life's on the line everyday to keep our country safe and free.
Then to my family and friends...
Everyone of you brings joy to my life in a special way.


This is a special Thanksgiving for me 
Although I have lived here in United States for 12 years.
This year I am an American! 
We need to be thankful and not only for today that we live in a country that is free...
that we are given the freedom of religion,
the freedom of speech,
Freedom!

May each and everyone of you have a wonderful Thanksgiving.
Marlys

Wednesday, November 21, 2012

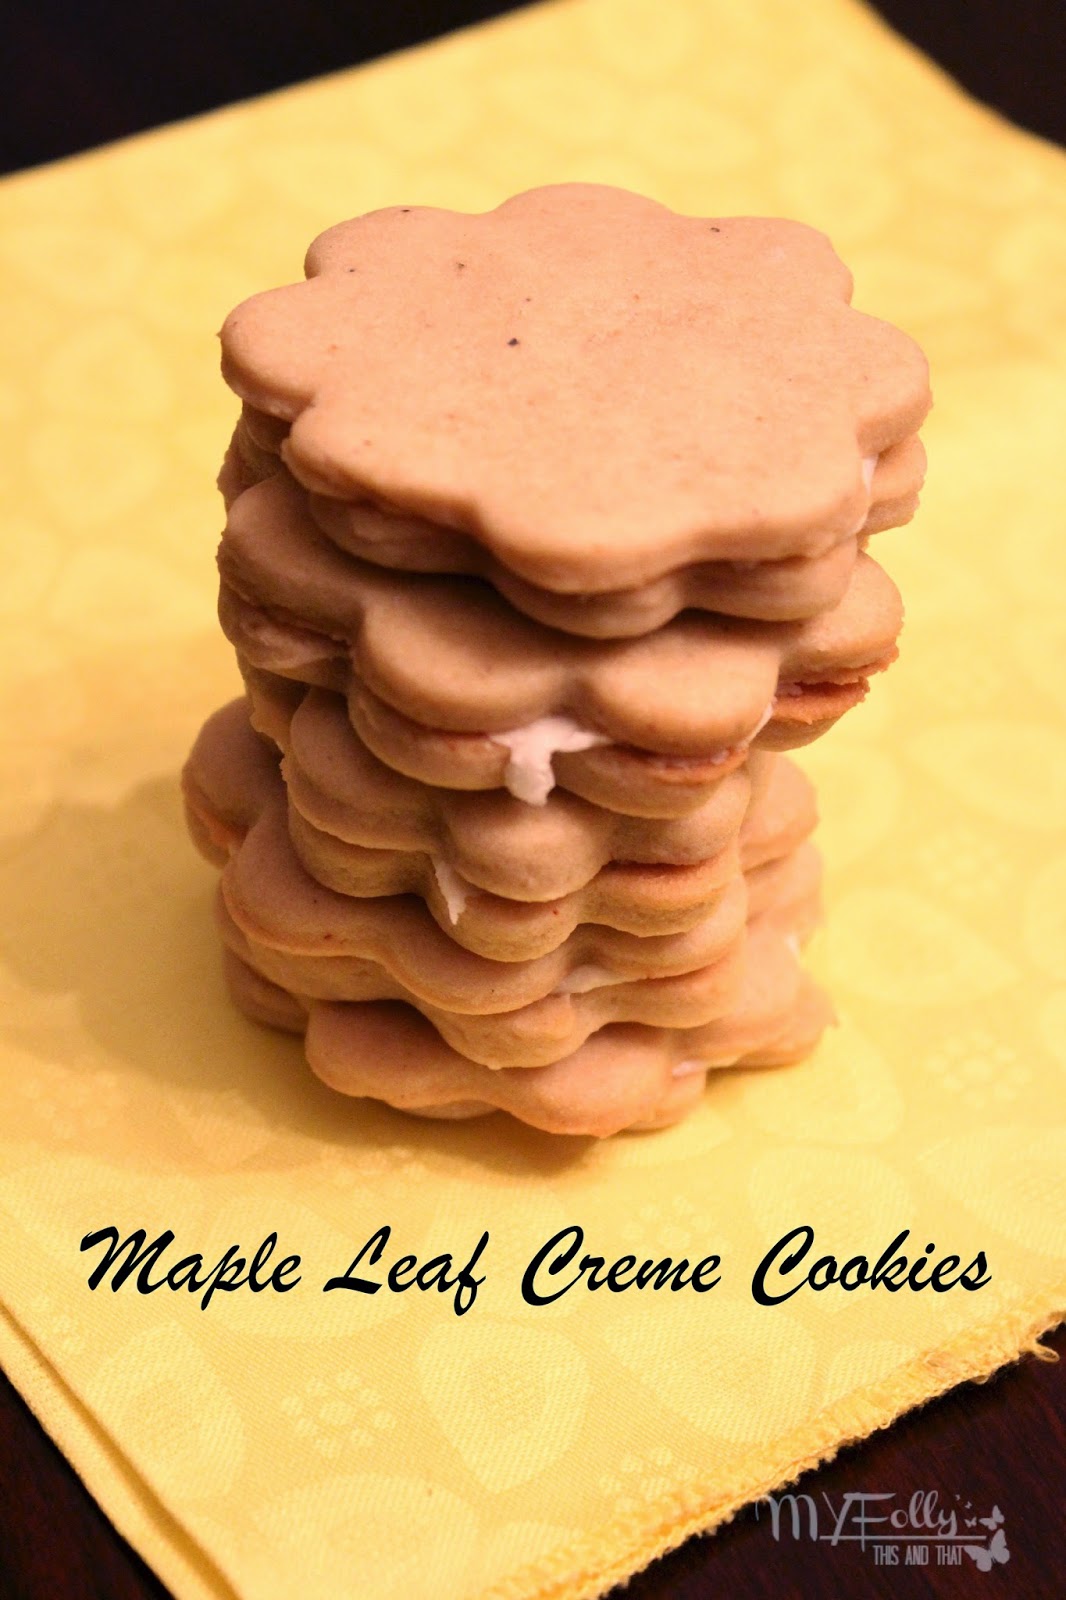
Maple Leaf Creme Cookies

A while back I had found some Dare Maple Leaf Creme Cookies in the local store
They brought memories of my childhood.
As I was eating them, my mind went to making my own.


First I had to find a recipes... so onto the web to search.
I found a recipe from Food shed that looked good as they said that they were imported to New England,
 I knew that the author knew how they tasted...
Great a recipe, now onto finding maple leaf cookie cutters...
I searched high and low in our area but couldn't find any, found every other kind of leaf but not maple leaf.
So I ended up making flower cookies instead of maple leaf...


Maple Leaf Cream Cookies
adapted from  Food Shed
3 cups flour
1 tsp salt
1/2 tsp baking powder
1/2 tsp nutmeg
1 1/4 cup unsalted butter, softened
1/2 cup brown sugar
1/2 cup maple syrup
1 egg
2 tsp vanilla

In bowl mix flour, salt, baking powder and nutmeg.  Set aside.  In separate bowl mix butter and brown sugar until fluffy, scraping sides down.  Mix in maple syrup, once mixed well add egg and vanilla and continue to mix, scraping sides.  Mix in dry ingredients on low until everything just comes together.  Form into a ball and chill in fridge for at least 2 hours or over night.
 Once chilled, preheat oven to 375 degrees.  Roll out dough to 1/4 inch thick and using cookie cutter, cut out shapes.  Place parchment paper or liner on cookie sheet and place cut out cookies on the cookie sheet, 1 inch apart.  Bake in 375 degree oven for 7-9 minutes, or until golden brown colour.  Cool on cookie sheet for 5 minutes and then transfer to cooling rack.  Once cooled arrange cookies according to size and frost the bottom cookie, lying the other cookie on top.

Frosting:
2 tbsp butter
2 tbsp maple syrup
2 cups icing (powdered) sugar
1/4 cup milk

Whip butter until soft, add about 1/2 cup icing sugar and continue to whip.  Add maple syrup and milk.  Add icing sugar until the frosting becomes stiff but spreadable.  You may have to add more icing sugar or milk to make it spreadable without being watery.